Netsuite is built for product companies more than service companies. However, companies can still invoice customers for services through Netsuite. This article explains, step-by-step, how to create a new invoicable service in Netsuite.
Step 1: Log into Netsuite
You will need to login as an administrator in order to create a new service.
Step 2: Open the New Service Item Form
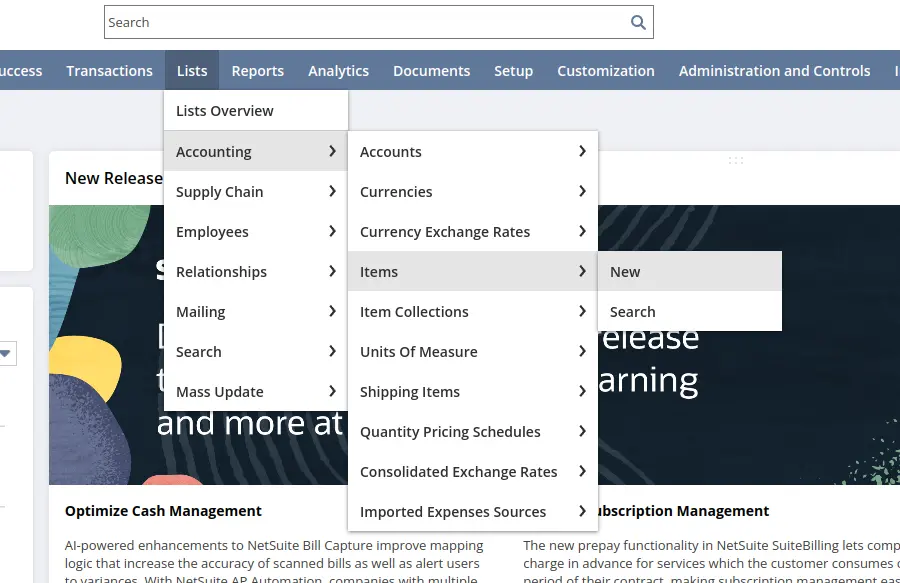
Hover over the following sequence of menu buttons “Lists” –> “Accounting” –> “Items” –> “New”. Click on “New”.
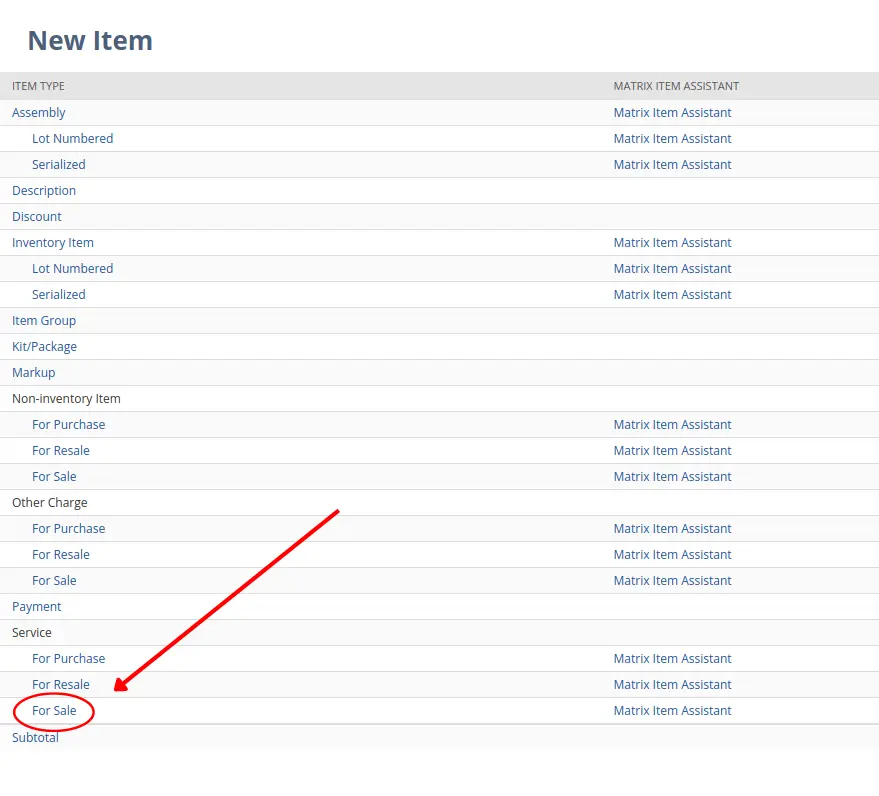
You should then see a screen like the one shown below. Look under the “Service” header and click on “For Sale”. This will open a form to let you create a new “Service for Sale” (which means a service your company sells but doesn’t buy).
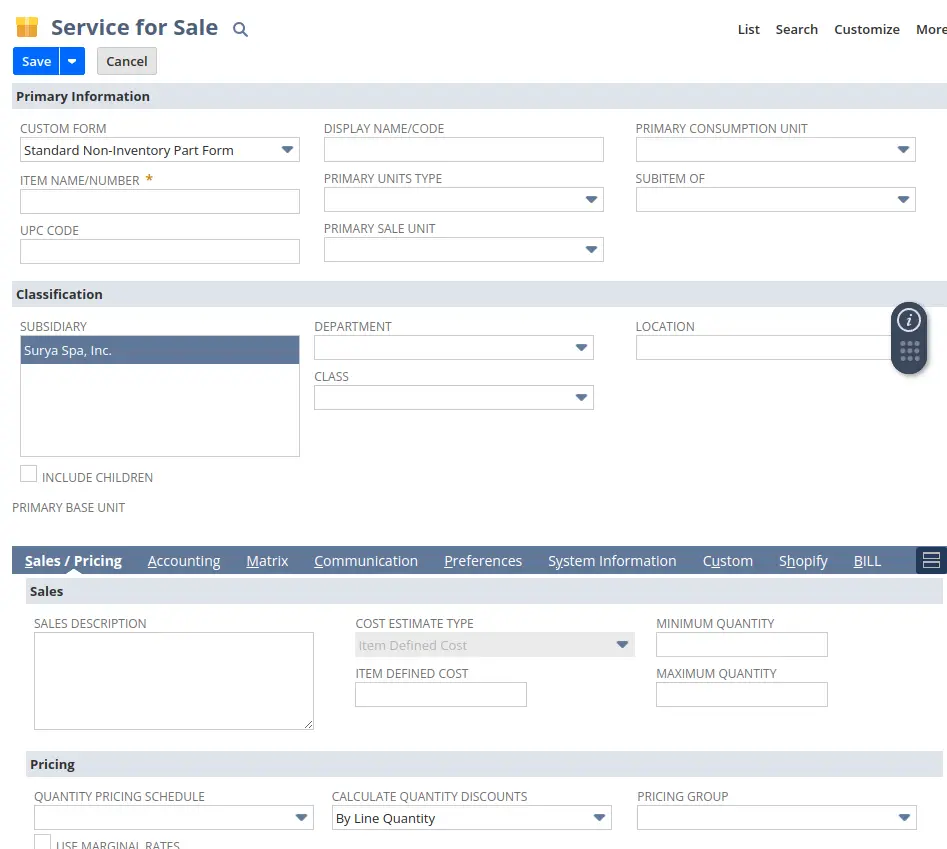
After clicking on the “For Sale” button, you should see a form like the one shown below. The purpose of this form is to specify details about the type and price of the new service your company will offer.
Step 3: Specify a Name for the Service
On the form, you must specify a name and/or number for the new service in the “Item Name/Number” field. Most other fields are optional and can be left blank or changed. However, if your new service represents a unit of some sort (e.g. 1 billable hour), you should change the “Primary Units Type” field to “Count”.
Step 4: Specify a Price for the Service
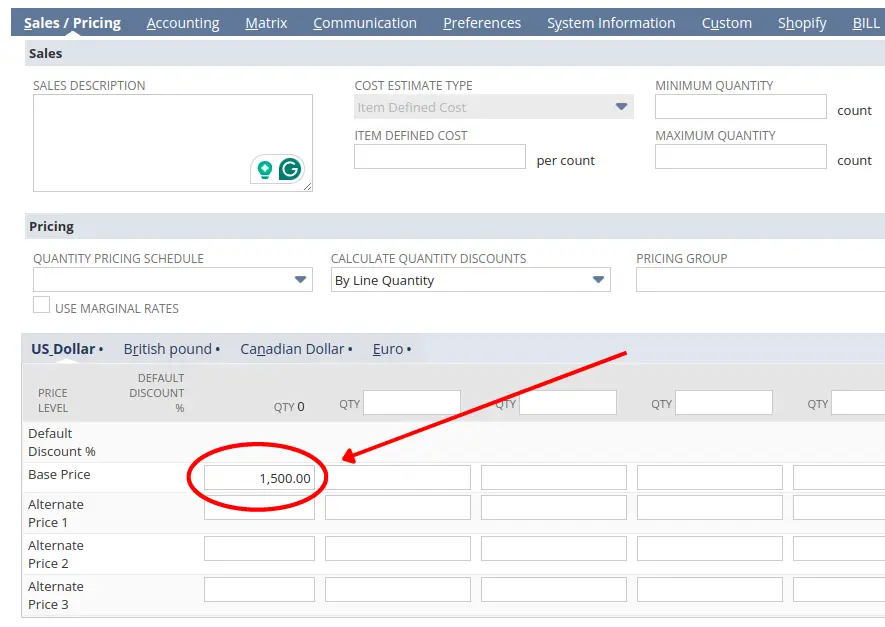
After you finish filling out the top part of the form, scroll down to the “Sales / Pricing” section. Enter the price of the service in dollars in the upper left price cell as shown in the screenshot below.
Step 5: Specify whether the Service is Subject to Sales Tax
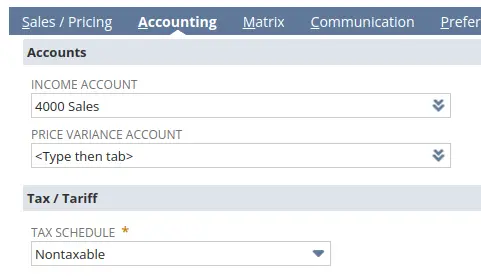
Click on the “Accounting” tab next to “Sales / Pricing”. Select the appropriate option from the “Tax Schedule” field drop-down menu. Many companies configure this field to either be “Taxable” or “Nontaxable” (referring to whether or not sales tax must be collected). Most services in most states are not subject to sales tax. However, there are exceptions so you’ll need to check state law or ask a sales tax expert in that state to know for sure.
Step 6: Save the form
Finally, click the blue “Save” button to save this new service type to Netsuite.